
Jasper Recipes is just one of the many tools offered by the Jasper AI writing software.
It allows you to write content at a faster pace which makes you much more productive and saves a lot of time.
I'm going to show you what Jasper Recipes are and how it works step by step. I have Jasper myself, so I am not just regurgitating someone else's content!
If you're not familiar with Jasper AI, take a look at my other content first:
What are Jasper Recipes?
Jasper Recipes are pre-built workflows that include a number of Jasper commands which will help you create content easily over and over again.
What are Jasper commands?
Jasper Commands are commands where you tell Jasper to do something. For example, you would just type "write an intro paragraph" or "write some blog post title ideas" etc. Jasper understands this, and gets to work.
It's literally like telling a person in chat what to do. That's the power of Artificial Intelligence found in Jasper.
Of course, you will need the Boss Mode plan to get these commands which will allow you to run Jasper recipes.
So now that you understand what commands are, how are these commands implemented in recipes?
It would look something like this:
- >write a brief for {TOPIC}
- >write blog post title ideas
- >write an introduction
- >write a blog outline
- >write about {OUTLINE_ITEM_1}
- >write about {OUTLINE_ITEM_2}
- >write about {OUTLINE_ITEM_3}
- >write a blog conclusion on {OUTLINE_ITEM_1}, {OUTLINE_ITEM_2}, {OUTLINE_ITEM_3}
You have three options on how to get Jasper Recipes:
- Create your own
- Use one of the 9 premade recipes found in Jasper
- Use recipes created by the community. You can also contribute your recipe to the community as well if you're feeling generous!
How to Use Jasper Recipes - Step by Step
As I mentioned before, Jasper Recipes run on commands, so you will need the Boss Mode plan for this to work.
If you want to get started right now - get the Boss mode plan free for 5 days.
Let's jump into this!
Step 1 - Choose a Pre-Made Jasper Recipe
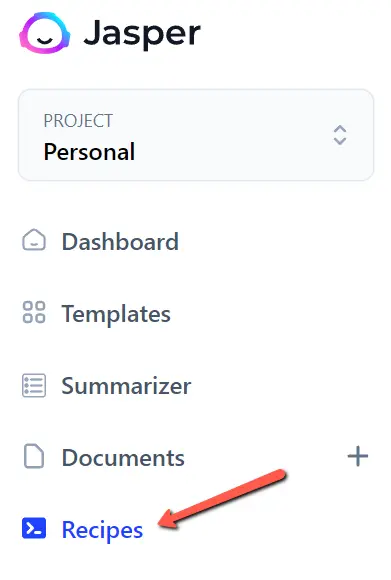
In your dashboard, you will see "recipes" near the bottom. Click it.
You can then choose any of these pre-made recipes. You can choose from:
- Cold email - write a perfect email using AIDA (Attention, Interest, Desire, Action
- Blog Post - write a blog post in just 5 minutes with this recipe
- The Idea Factory - Come up with some great ideas for your next project
- Facebook Ad - Write compelling Facebook ads using the PAS framework (Problem, agitate, solution)
- Product Review Blog Post - As an affiliate marketer, this one is gold. Write product reviews 10x faster
- The Hero's Journey Online - Use this 12 stage character & Story Arc development to come up with a story of relatability for your audience
- Rewrite/Expand Blog Posts - Improve your existing content with this recipe
- Video Script Blueprint with Show Notes - Create a video script blueprint with show notes that can be used as a blog post
- The Perfect Non-Fiction Book - Use this recipe for the structure of your non-fiction book


At this point you would simply choose a recipe that applies to you.
For each one that you click, there will be video instruction on how use it. You'll also see a "run" button that executes the recipe.
That is the next step.
Step 2 - Run the Recipe
For this example, I am going to use the "Blog Post" recipe. When you click on it, you'll first see a video on how to use it and the "run" button that you'll click which is located at the upper right hand corner.
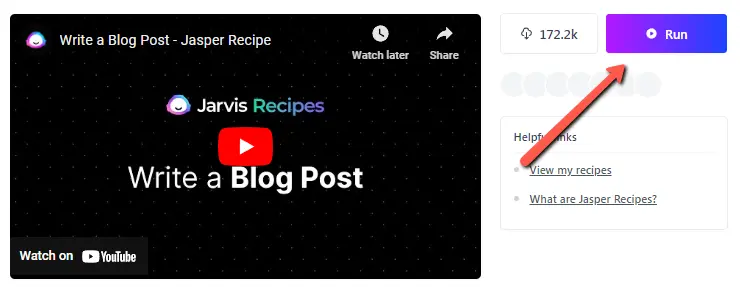
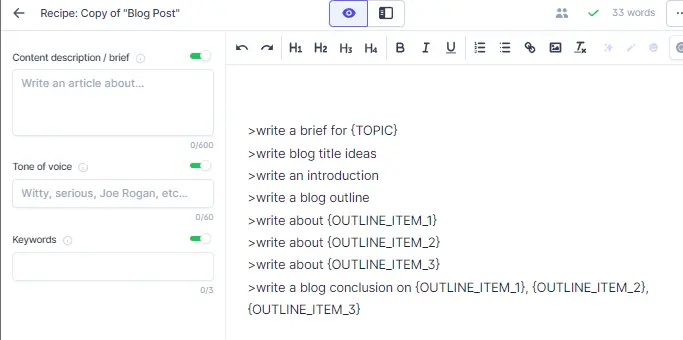
After you click "Run", a new window opens that looks like this:
Step 3 - Execute the Commands
So in looking at the above image, you will see the first line is >write a brief for {TOPIC}.
You should know what your topic is, so let's use an example to illustrate. I will use the topic "how to start a blog" as an example.
What you will do is replace {TOPIC} with "how to start a blog".
It will look like this:
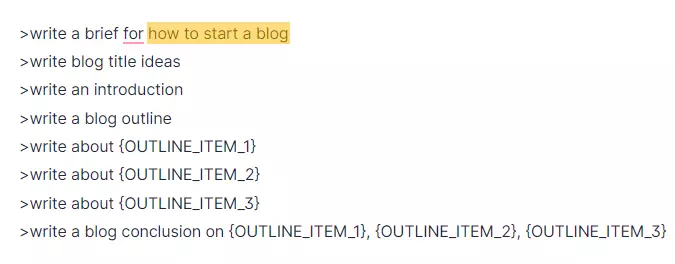
The next thing is to make sure your curser is clicked at the end of the first line after the word "blog" in this case and hit the "Run Command" button at the bottom or "Command + Enter" on a Mac or "Ctrl + Enter" on a PC.
When you do this, it will execute the command and start to generate a paragraph for that command.
Highlighted below is the output for this command in Jasper:
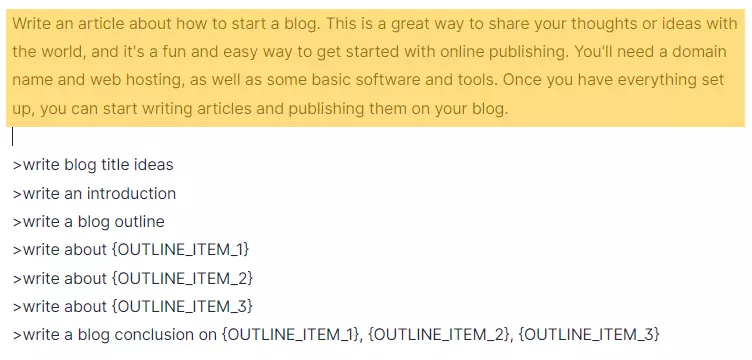
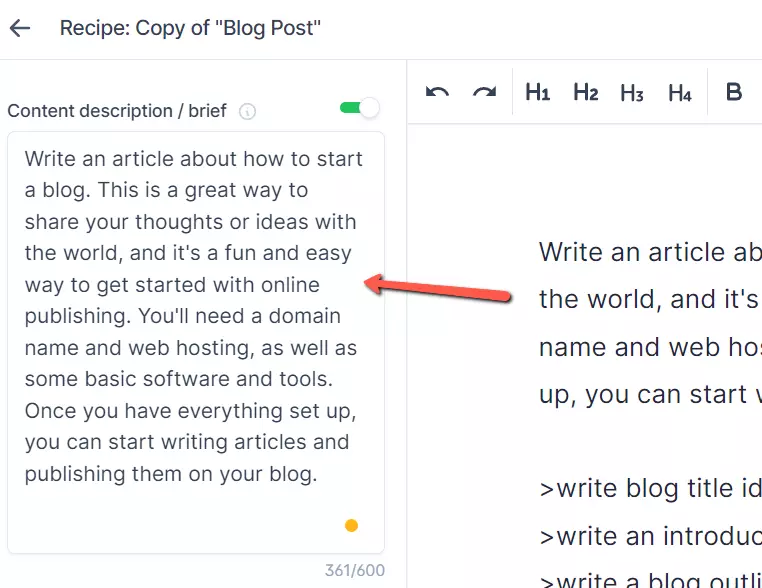
Next, you are going to copy the generated text for your brief and paste it in the "content description / brief box in the left pane.
You will then run another command for the second line ">write blog title ideas". To to this, click anywhere on that line or highlight it then run the command.
Here is the result I got:
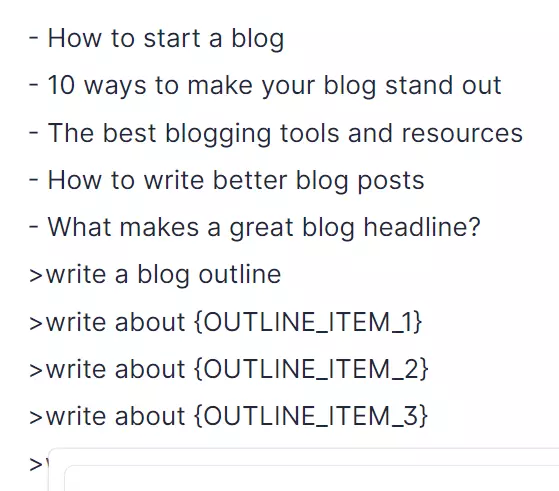
At this point, you can choose one of the outputs for a title, or if you have your own title you can use that as well. For this example, I will choose the 2nd one. Delete the other titles and keep that title at the top. In older versions of Jasper you would put the title in the title box on the left hand pane, but that has been removed.
Next, you will execute the command ">write a blog outline".
Here are the outputs I got:
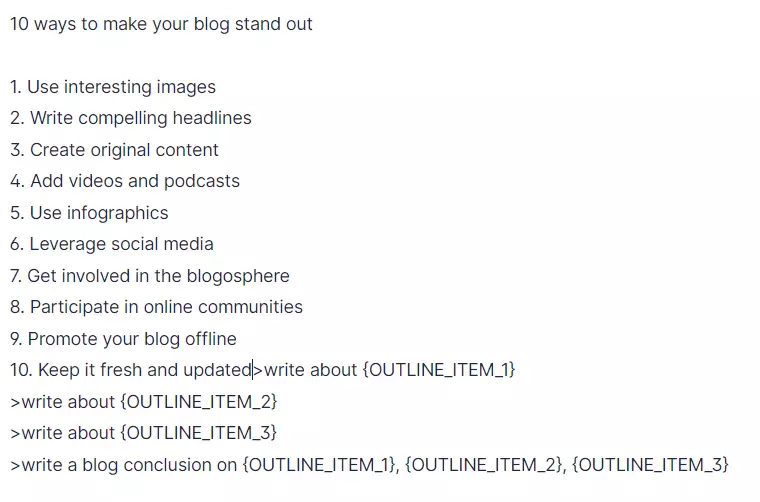
As you can see, Jasper understands what my article is about based on the title and also reads the content brief that I inputted earlier.
It came up with 10 ways to make a blog post stand out. We can now expand on each one of these for the article.
To do this, you simply plug in each item to the corresponding outline item as seen in the image below:
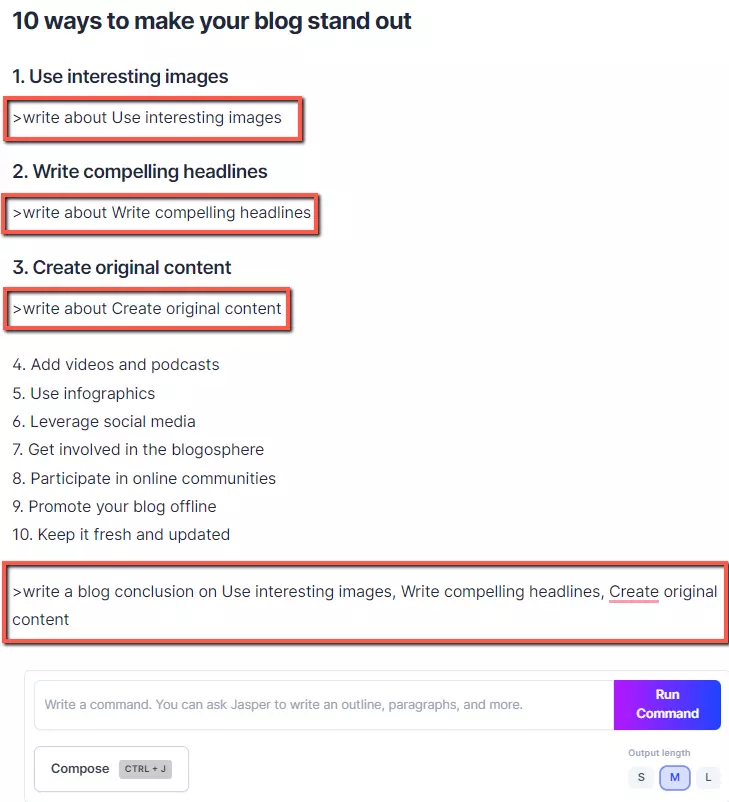
For each one of the headings Jasper came up with you would run the command where indicated with the red box. You would do for each and also the conclusion paragraph.
Step 4 - Edit Your Document
Jasper isn't perfect, so you will have to make some edits to the content. To expand on the content if it isn't long enough, you can use the compose button right after each paragraph to write more content.
Once you are done, your article will be saved in "documents" and you can simply copy and paste the content into your blog.
How to Create Your Own Recipe
Because Jasper provides a great number of recipes and you also have options for other recipes in the community, you probably won't need to create y0ur own.
However, if you have specific needs that you need to repeat often and can't find something that works, then you can create your own Jasper Recipe.
To do this, you simply click "New recipe" in the top right hand corner while you are in the Recipes section.

You would then add a name, description and also content for your recipe.
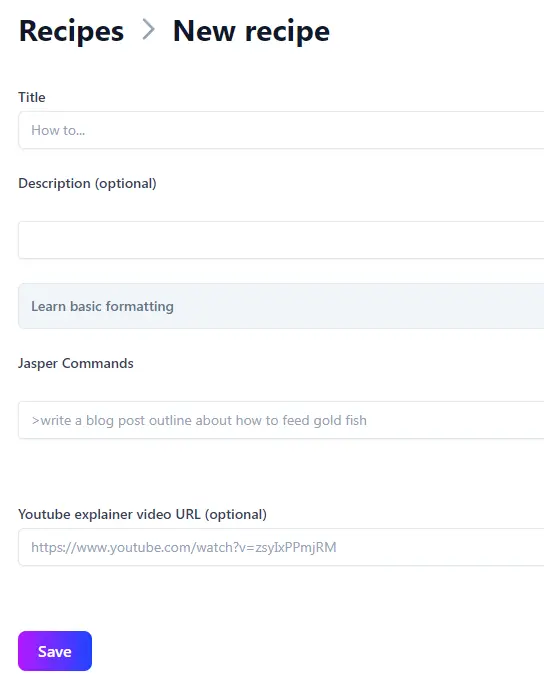
The YouTube video link would be a video you create to show others how the recipe works. This is entirely optional.
Finally, click save.
Sharing Your Jasper Recipe with Others in the Community
If you're feeling generous and you want to share a recipe that you created with other Jasper members, then the first step is to open your recipe and check the sharing options at the bottom.
- To keep is private and not share, make sure that "private" is selected.
- To share and make public, choose the public link.
When you enable sharing, only people that have an active Jasper subscription will be able to view the url of your recipe.
Are Jasper Recipes Worth it?
I think there is some value with Jasper recipes for certain situations. In the beginning when Recipes were introduced, it was a way to make sense of the Jasper Commands. It made it less confusing to write full length blog posts, emails, or re-write blog posts.
Jasper has evolved a lot since then and I find recipes are no longer needed. This is especially true if you are focused mainly on writing blog posts.
This is because Jasper's new "Blog Post Workflow" is almost like an automated recipe that does all the work without the copying and pasting.
It will really come down to what you are trying to accomplish whether or not recipes will be useful to you or not.
I personally don't use them anymore but others may stick to this strategy because it works for them.
Do you have Jasper yet?
If not - get 10,000 words for free with a free Jasper trial!
- Best Ways to Make Passive Income on YouTube - April 15, 2024
- How I Make Faceless YouTube Channels With AI - April 9, 2024
- Top 21 Faceless YouTube Niches to Earn Big Profits in 2024 - April 3, 2024

