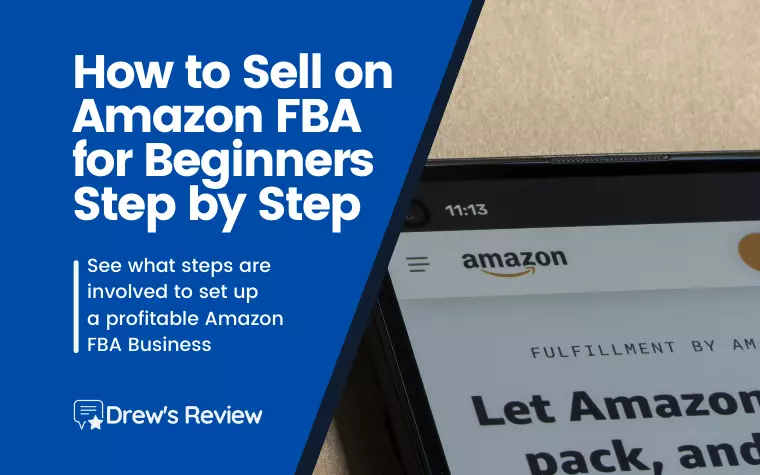
If you are new to selling on Amazon FBA, this blog post will help get you started. We’ll walk you through the steps of becoming an Amazon seller and give you some tips for setting up your first product listing.
You can make money online by using the fulfillment services of amazon.com. You will sell products that you get from manufacturers or wholesalers at a price that is much cheaper than retail prices.
FBA (Fulfillment by Amazon FBA) can be a complicated process but this guide will walk you through the fundamentals. How do I find a product? How do I find suppliers? How much money can I make?
This article will answer these questions and more, providing tips on how to sell on Amazon FBA for beginners in a step-by-step fashion.
What is Amazon FBA
Amazon FBA is also known as “Fulfillment by Amazon.” This often-used term refers to the method of fulfilling your orders by sending them directly to Amazon. Amazon will then send the product to customers on your behalf.
You pay Amazon FBA fees, but you do not have to worry about finding customers or packing orders. You send the product in bulk straight to Amazon, and then they take care of the rest!
How to Sell on Amazon FBA for Beginners Step by Step
Below is a guide on how you can start selling on Amazon as a complete beginner. Many ordinary people from all walks are Amazon sellers and some make a staggering 6 figures a month doing this.
Step 1: Product Research & Validation
Before you even think about signing up for an Amazon seller account, you need to find the right product to sell. This is where most beginners either nail it — or crash and burn. Don’t worry though, finding a winning product isn’t about luck. It’s about a little research and common sense.
If you’re still in the product-research stage, check out my detailed guide on how to find trending products to sell online. It breaks down 13 proven methods (including Google Trends and TikTok) to help you spot products before everyone else does.
🎯 What Makes a “Good” FBA Product?
You want something that:
- Solves a small problem or makes life easier
- Isn’t dominated by huge brands
- Has steady demand (not just a short-term trend)
- Sells for at least $20 so there’s room for profit
- Isn’t oversized or fragile (to keep Amazon FBA fees low)
A good rule of thumb: light, small, and simple sells best when you’re starting out.
🔍 Tools to Help You Research
You don’t have to guess what sells. Tools like Jungle Scout, Helium 10, or AMZScout can show you:
- Estimated monthly sales for any product
- Average selling price and competition level
- Historical trends so you can see if demand is growing or dying off
Even without fancy tools, just browsing Amazon’s “Best Sellers” and “Movers & Shakers” pages can spark ideas. Pay attention to the reviews — if a product has thousands of sales but tons of complaints, that’s an opportunity to create something better.
💡 Validate Before You Commit
Before ordering anything, double-check:
- Is there enough search volume for this product?
- Are there at least 3–5 sellers making steady sales (means demand exists)?
- Can you realistically offer something different — better quality, bundle, new color, improved packaging?
Take a few notes in a spreadsheet, compare ideas, and pick the one that excites you the most but also makes business sense. Once you’ve validated your idea, you’re ready to move on to the next step — finding suppliers.
Step 2: Choose Your Niche
In order to be successful with your Amazon business, you need to choose the right niche. This is incredibly important!
If you are starting out, you should choose something that has good demand, but low competition. This way, you will be able to rank in the search results more easily. Good options include products like clothing, shoes, and jewelry as long as there’s not too much competition for these niches.
You should also look at the types of competitors selling in your chosen niche. If they all have 4 or 5-star ratings, then it will be difficult to compete with them on product quality alone. However, if many of them have 2-star ratings or worse there’s a lot less competition when it comes to review count!
Additionally, avoid choosing extremely saturated markets when just starting out with FBA. This is because you will have a harder time competing against more established brands that sell at a lower price. You can still do this, but if you really want to be successful, go for something with lower competition.
Before moving on from this step, it’s important to note that most of the things mentioned above can be used as criteria when sourcing products as well! So keep these tips in mind!
Step 3: Finding and Working With Suppliers
Now that you’ve chosen your niche and validated a product idea, it’s time to figure out where you’re actually going to get it from.
Most new sellers start with Alibaba.com — a massive marketplace of manufacturers and wholesalers. But don’t worry, you don’t need to order thousands of units right away or speak Chinese to get started.
🔍 Start Your Supplier Search
- Go to Alibaba (or AliExpress for smaller test orders) and search for your product.
- Short-list 5 to 10 suppliers that have:
- A good rating (4 stars or higher)
- At least 2 years in business
- “Gold Supplier” or “Verified” status
- Message them with a short, polite intro like: “Hi, I’m starting a small business selling [your product] on Amazon. Can you send me your price list, minimum order quantity, and shipping options to the U.S.?”
📦 Ask the Right Questions
You’re not just looking for the lowest price — you’re looking for a reliable partner. Ask about:
- MOQ (Minimum Order Quantity) – how many units you have to buy at once
- Lead time – how long production takes
- Customization – can they print your logo or packaging?
- Payment terms – PayPal or Alibaba Trade Assurance is safest for beginners
Don’t be shy about requesting samples from 2 or 3 suppliers. You’ll quickly see who communicates well and delivers quality.
🧠 Pro Tip
Once you find a supplier you like, stay in touch with them on WhatsApp or WeChat — that’s how most factories communicate. Building a friendly relationship can get you better pricing and faster responses later on.
If overseas sourcing feels intimidating, you can also check U.S.-based wholesale sites like ThomasNet, SaleHoo, or even Etsy Manufacturing for smaller domestic suppliers.
The goal right now isn’t to overcomplicate things — it’s simply to find a supplier who delivers a quality product at a price that leaves room for profit. Once you’ve done that, you’re ready to move on to the next step — understanding Amazon FBA costs and fees.
Step 4: Understanding Amazon FBA Costs and Fees
Before you jump in and start ordering products, it’s important to know how much it really costs to sell on Amazon. Many beginners skip this part, then get surprised when their profits are smaller than expected.
The good news? Once you understand the main fees, you’ll be able to price your product properly and still make money.
🧾 The Main Amazon FBA Fees
Here’s a breakdown of the most common costs you’ll run into:
| Fee Type | What It Covers | Typical Range |
|---|---|---|
| Referral Fee | Amazon’s cut for letting you sell on their platform | 8–15% of sale price |
| FBA Fulfillment Fee | Picking, packing, and shipping your order to customers | $3–$6 per unit (depends on size/weight) |
| Monthly Storage Fee | For keeping your inventory in Amazon’s warehouse | Around $0.75–$2.50 per cubic foot |
| Long-Term Storage Fee | Extra fee if inventory sits longer than 365 days | Varies – avoid by managing stock |
| Returns/Refunds | Amazon processes these for you, but small fees apply | Usually $1–$2 per item |
🧠 Pro Tip: Use Amazon’s free FBA Revenue Calculator (Google it!) — plug in your product’s price, size, and weight to see exactly how much you’ll make after fees.
💡 Don’t Forget Your Own Costs
Amazon fees aren’t the only expenses. You’ll also have:
- Product cost (what you pay your supplier)
- Shipping cost (from supplier to Amazon warehouse)
- Branding (logo, packaging, labels)
- Advertising (Amazon PPC or influencer shout-outs)
A simple way to check if your product idea is profitable:
Target at least a 30% net profit margin after all costs.
For example:
- Product cost: $5
- FBA + Amazon fees: $6
- Sell price: $20
- Profit = $9 (45% margin — solid!)
🧮 Keep Things Simple
When you’re starting out, aim for smaller, lightweight products with low storage and shipping costs. Every extra dollar in fees eats away at your profit.
Once you get the hang of your numbers and start generating steady sales, you can scale up and experiment with higher-priced or bulkier products.
Now that you know how the money side works, you’re ready to move on to the fun part — creating your brand name and getting your Amazon Seller account set up.
Step 5: Create Your Brand Name
Now that you understand your costs and have your product lined up, it’s time to create your brand identity — the name customers will remember when they buy from you.
Even if you’re only selling one product at first, think long-term. A solid brand name makes your listings look more professional, helps build trust, and opens the door to launching more products later on.
💡 What Makes a Good Brand Name?
When brainstorming names, keep these points in mind:
- Short and simple – easy to spell, say, and remember
- Relevant – hint at what your product does or the feeling it gives (e.g., “ZenMat” for yoga mats)
- Original – check that no other company is using it or has it trademarked
- Domain available – ideally, your .com domain or close variant should be free
- No restricted words – avoid using “Amazon,” “Prime,” or other brand-specific terms
Spend a little time testing names with friends or family — if they can spell and pronounce it easily, you’re on the right track.
🔍 How to Check Brand Availability
Before you commit, do a quick search:
- Google it – see if someone else is using the same name.
- USPTO.gov (or your country’s trademark site) – check trademarks.
- Namecheap.com or GoDaddy.com – check if the domain name is available.
- Social media – make sure usernames are free on Instagram, TikTok, and Facebook.
If your top pick is taken, tweak it slightly. For example, if “BrightBeam” is taken, try “BrightBeam Co” or “Shop BrightBeam.”
✨ Bonus Tip: Brand Design
Once you’ve locked in your name, create a simple logo and color theme that matches your niche.
You can use tools like Canva, Looka, or Fiverr to design one for under $20.
Keep your logo clean and easy to print — remember, it’ll go on your packaging, product inserts, and maybe your Amazon Storefront later.
A great brand name does more than just look nice — it builds trust. Customers are more likely to buy from “EverPure Co” than from “Generic Water Bottle 123.”
Once your brand identity is set, you’re ready for the next step — creating your Amazon Seller Account and officially becoming an Amazon FBA seller.
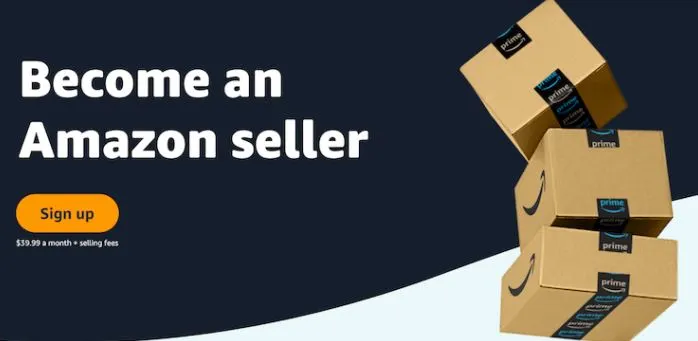
Step 6: Create Your Amazon Seller Account
Alright — you’ve got your product idea, your brand name, and a solid understanding of costs. Now it’s time to officially become an Amazon seller!
Setting up your seller account is simple, but there are a few things to know before you start.
🧾 Choose the Right Account Type
Amazon offers two types of seller accounts:
| Account Type | Best For | Monthly Cost | Per-Sale Fee |
|---|---|---|---|
| Individual | Beginners selling <40 items/month | Free | $0.99 per sale |
| Professional | Active sellers or anyone serious about building a business | $39.99/month | No per-item fee |
If you’re just testing the waters, you can start with an Individual account. But if you plan to treat this as a real business, go straight for the Professional plan — you’ll save money once sales start rolling in and get access to tools like bulk listing and advertising.
🧠 What You’ll Need to Sign Up
Before you begin, make sure you have:
- A valid government ID (passport or driver’s license)
- Bank account and routing number (for payouts)
- Credit card for verification
- Business email (ideally branded, e.g. [email protected])
- Tax information (Amazon will ask for W-9 or equivalent form)
Go to sellercentral.amazon.com and click “Sign Up.” Follow the on-screen instructions and fill everything out accurately — small mistakes in your name or address can delay verification.
🔐 Verification and Setup Tips
- Amazon might ask for a short video verification where you show your ID — it’s normal.
- Once approved, take a few minutes to explore Seller Central — that’s your main dashboard.
- Set up 2-step verification for extra security.
You’ll also want to fill out your “Return Settings” and “Shipping Settings.” Amazon FBA handles most of this for you, but it’s still good to review and make sure it matches your business preferences.
🧩 Pro Tip
If you’re selling under a brand name, consider applying for Amazon Brand Registry later. It gives you extra protection and access to enhanced marketing tools (like A+ content and a brand store).
Once your account is live, you’re officially an Amazon seller 🎉 — now you can move on to the exciting part: shipping your products to Amazon’s warehouse.
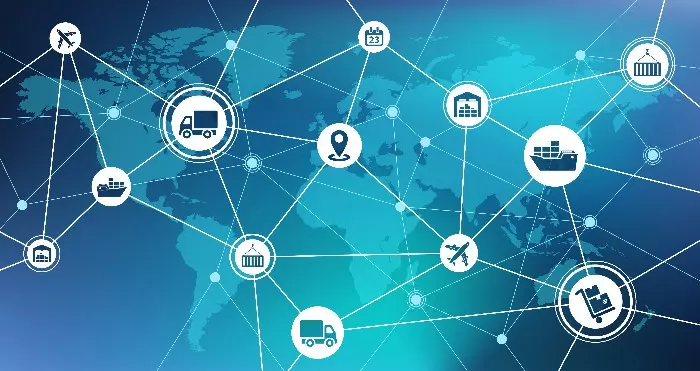
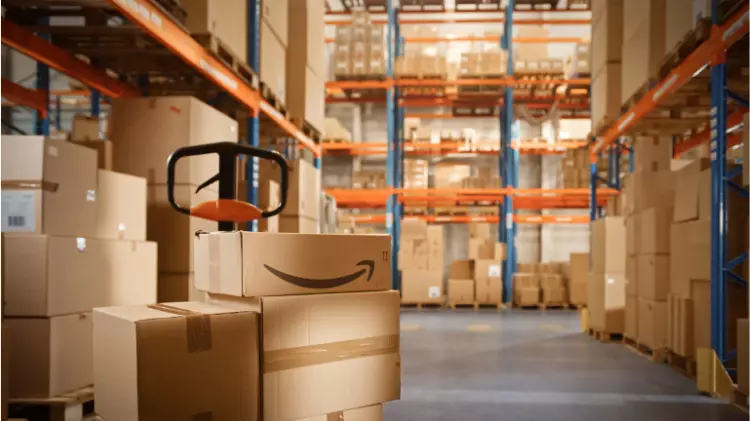
Step 7: How to Ship Your Product to Amazon
Now that your Amazon Seller Account is set up and you’ve got your products ready, it’s time to send them to Amazon’s warehouse — also called FBA (Fulfillment by Amazon) centers.
This is where Amazon takes over the heavy lifting — storing, packing, and shipping your orders for you. Your job is to make sure your products get there safely and correctly.
📦 1. Prep Your Products
Before shipping, make sure every unit meets Amazon’s packaging requirements. That means:
- Each product needs a scannable barcode (either a manufacturer UPC or Amazon FNSKU label)
- Use poly bags or boxes for protection
- If your item could leak, has sharp edges, or is fragile — package it securely or double-bag it
🧠 Pro Tip:
Most suppliers on Alibaba can do “Amazon FBA prep” for you. That means they’ll label and package everything according to Amazon’s rules — just ask them before placing your order.
🏷️ 2. Create a Shipping Plan in Seller Central
Here’s how:
- Log in to Seller Central
- Go to Inventory → Manage FBA Shipments
- Select the products you’re sending
- Click Send/Replenish Inventory
- Enter how many units you’re shipping and from where (your supplier or your address)
- Choose “Small Parcel Delivery” (SPD) for small boxes or “Less Than Truckload” (LTL) for big shipments
Amazon will automatically assign one or more fulfillment centers for your shipment.
🚛 3. Shipping Options
You have two main ways to get your products to Amazon:
- Direct from Supplier:
Have your supplier ship directly to Amazon’s warehouse — easiest and cheapest if they know how to do FBA prep. - Ship to Yourself First:
You receive the products, inspect them, then send them to Amazon. This adds time and cost, but you can check quality before committing.
Use Amazon’s partnered carriers (like UPS) for discounted shipping rates.
✅ 4. Track and Confirm
Once shipped, track your packages and confirm delivery in Seller Central. When Amazon receives and checks them in, your inventory will show as “Available.”
Now your product is live and ready for sale — customers can find it, buy it, and Amazon will handle fulfillment automatically.
💡 Final Tip
Always start with a small test shipment first — maybe 50–100 units. This helps you confirm that your product, packaging, and shipping all go smoothly before scaling up.
Once your first batch arrives safely and your listing goes live, the next step is to optimize your listing so it actually gets clicks and sales.
Step 8: Create Your Product Listing & Optimize It
Now comes one of the most exciting parts of the entire process — creating your Amazon product listing!
This is where you show off your product, attract buyers, and convince them to hit that “Add to Cart” button.
A well-optimized listing not only makes your product look great but also helps Amazon rank it higher in search results.
🧾 1. Create Your Listing in Seller Central
- Log in to your Seller Central account.
- Go to Inventory → Add a Product.
- If your product already exists on Amazon (like a generic item), you can list under that ASIN.
But if it’s your own brand, click “I’m adding a new product.” - Choose the most accurate category — e.g. Home & Kitchen → Storage Bins → Fabric Bins.
You’ll then enter all your basic details:
- Product title
- Brand name
- Manufacturer
- UPC or FNSKU code
- Price
- Quantity
Once that’s done, it’s time to optimize it for visibility and conversions.
🔑 2. Optimize Your Product Title
Your product title is the most important part of your listing for both buyers and Amazon’s search algorithm.
✅ Include these:
- Main keyword (what people search for)
- Key feature or material
- Quantity or pack size (if relevant)
Example:
“EcoGrip Yoga Mat – Non-Slip, Extra Thick 1/4 Inch, Carry Strap Included – Ideal for Home & Gym Workouts”
Keep it under 200 characters and make sure it sounds natural — don’t just stuff in keywords.
📸 3. Use High-Quality Photos
Your photos sell your product. Aim for at least 6–8 images, including:
- A clean white background main image (Amazon requires this)
- Lifestyle shots (product being used)
- Close-ups of important features
- Packaging or bundle contents
- Infographic-style image highlighting key benefits
🧠 Pro Tip: If your supplier can’t take good photos, hire a freelance product photographer from Fiverr or Upwork — it’s worth every penny.
📝 4. Write Compelling Bullet Points & Description
Your bullet points are what customers read first, so make them benefit-driven, not just feature-heavy.
Example format:
Non-Slip Design: Stay confident during workouts — textured surface keeps you stable on any floor.
Eco-Friendly Material: Made from high-density, latex-free TPE that’s safe and long-lasting.
In your description, tell a mini story: why you created the product, how it helps, and what makes it better.
Break long paragraphs into short, scannable chunks.
💬 5. Add Backend Keywords
In Seller Central, you’ll see a field for “Search Terms.”
This is where you can include extra keywords customers might type in, like alternate spellings, colors, or synonyms.
Example: if you sell “coffee mugs,” backend keywords could be: tea cup, ceramic mug, gift for coffee lover, mug set.
📈 6. Price Smart
When launching, keep your price slightly below competitors to encourage early sales and reviews.
Once you gain traction, you can gradually raise it.
A strong listing = more visibility, more sales, and more chances to climb Amazon’s rankings.
Once your listing is live, the next step is to manage your inventory so you never run out of stock (or get stuck paying storage fees).
Step 9: Inventory Management
Once your product is live on Amazon, it’s time to make sure you never run out of stock — but also don’t overstock and waste money on storage fees.
Getting this balance right is what smart sellers call inventory management.
⚖️ Why Inventory Management Matters
Running out of inventory can hurt your Amazon ranking. When your listing goes “out of stock,” Amazon stops showing it in search results, and it can take time to recover once you’re back in stock.
On the flip side, ordering too much inventory means higher storage fees, especially if your products sit in Amazon’s warehouse too long.
So the goal is simple: Keep just enough inventory to meet demand — no more, no less.
📊 Keep an Eye on Your Numbers
Inside your Amazon Seller Central dashboard, go to:
Inventory → Inventory Planning
Here, you can see:
- Days of supply remaining (how long your current stock will last)
- Restock recommendations
- Excess inventory alerts
Make it a habit to check this every few days, especially once sales start picking up.
🔁 Reordering the Smart Way
A good rule of thumb is to reorder when you have about 4–6 weeks of stock left.
That gives your supplier enough time to produce, ship, and restock your products before you run out.
If you’re ordering from overseas, remember to factor in:
- Production time (often 2–4 weeks)
- Shipping time (air: 5–10 days, sea: 30–40 days)
🧠 Pro Tip:
Keep a simple spreadsheet that tracks:
- Current inventory
- Average weekly sales
- Lead time (days to restock)
This helps you forecast how much to order next time.
📦 Handling Returns and Unsold Stock
Amazon automatically handles returns for FBA sellers, but you can still choose what happens to returned or unsold stock:
- Dispose: Amazon gets rid of it for a small fee.
- Return to you: Have it shipped back to inspect or repackage.
- Liquidate: Sell through Amazon’s liquidation program at a discount.
If you ever have slow-moving stock, consider running a coupon or discount campaign to clear it out and free up space.
Staying on top of your inventory ensures your Amazon business keeps running smoothly — and profitably.
Now that your stock is under control, it’s time to focus on one of the most important parts of long-term success: customer reviews.
Step 10: The Importance of Customer Reviews
You can have the best product and photos in the world — but without customer reviews, most shoppers will scroll right past your listing.
Reviews are Amazon’s version of social proof. They build trust, boost conversions, and even help your listing rank higher in search results.
So let’s talk about how to get them — the right way.
💬 Why Reviews Matter
When someone searches for a product, they instantly look at two things:
- ⭐ The average rating (ideally 4 stars or higher)
- 💭 How many people have left reviews
A product with 4.6 stars and 120 reviews will almost always outsell one with 4.0 stars and 10 reviews — even if it’s cheaper.
🚀 How to Get Your First Reviews
- Ask Early Customers Politely
After someone buys, Amazon lets you send a polite “Request a Review” message from your Seller Central account.- Go to Orders → Manage Orders
- Click “Request a Review” next to the order
It sends a standardized message directly from Amazon (so it’s 100% compliant).
- Enroll in Amazon’s Vine Program
If you’re a Brand Registered seller, you can send free products to Amazon Vine reviewers in exchange for honest feedback. It’s a great way to get early traction. - Add a Product Insert (Compliant One!)
Include a small thank-you card in your packaging that says something like: “Thanks for supporting our small business! If you love your new [product name], we’d really appreciate your feedback on Amazon.”
Just don’t offer incentives, discounts, or rewards for reviews — that’s against Amazon’s rules. - Focus on Quality and Service
The best way to get good reviews? Deliver a great product and ship on time. Respond quickly to messages and resolve any issues — happy customers often leave positive reviews on their own.
⚠️ What Not to Do
🚫 Don’t buy fake reviews — Amazon is extremely strict and can suspend your account.
🚫 Don’t ask friends or family to leave reviews — Amazon tracks IPs and connections.
🚫 Don’t use manipulative language like “Leave a 5-star review” — just ask for honest feedback.
💡 Pro Tip
If you get a negative review, don’t panic — it happens to everyone.
Read it carefully and see if there’s something you can fix. Often, improving packaging or updating instructions can prevent the same complaint in the future.
Even a few 3-star reviews can make your listing look more authentic — as long as the majority are positive.
The more genuine, positive reviews you collect, the faster your Amazon business grows.
Once you’ve built up some trust and sales, it’s time for the final piece of the puzzle — marketing and scaling your FBA business.
Step 11: Marketing & Scaling Your Amazon FBA Business
Once your product is live and getting a few sales, it’s time to shift gears from launch to growth.
This is where marketing comes in — getting more people to find your listing and building a brand that customers remember.
📈 1. Start With Amazon PPC
Amazon PPC (Pay-Per-Click) ads are one of the easiest ways to get your product in front of buyers.
You only pay when someone clicks your ad, and you can start with as little as $5–10 a day.
Here’s how to begin:
- Go to Advertising → Campaign Manager inside Seller Central.
- Choose “Automatic Campaign” – Amazon will pick keywords for you.
- After a week, review which keywords brought sales.
- Pause anything that’s wasting money and create a Manual Campaign with your winning keywords.
🧠 Pro Tip: Use long-tail keywords like “eco yoga mat non-slip for beginners.”
They’re cheaper and convert better than broad ones like “yoga mat.”
💬 2. Leverage Social Media & Influencers
Don’t rely on Amazon alone — send external traffic to your listing too.
- Create a simple Instagram or TikTok page for your brand.
- Share short clips or photos showing your product in action.
- Reach out to micro-influencers (1–10k followers) who already post about your niche. Offer them a free product in exchange for a video review.
If you have a blog or YouTube channel, add your Amazon link there too — every bit of traffic helps your ranking.
📦 3. Build an Email List or Customer Base
Amazon doesn’t give you direct customer emails, but you can build your own list outside of Amazon.
- Create a simple landing page offering a free guide or coupon in exchange for an email.
- Use that list to share new product launches or limited-time discounts.
This helps you build your own brand audience that you can sell to again and again — even outside Amazon later.
📊 4. Track and Optimize Your Results
Every few weeks, review your Seller Central dashboard and check:
- Which keywords drive most sales (keep those ads running)
- Which products get most clicks but few purchases (update listing photos or title)
- What’s your ACoS (Advertising Cost of Sales) — aim for 25–35% or lower
Small tweaks each week can make a big difference over time.
🧠 5. Think Beyond One Product
Once you’ve got a profitable product, use your experience to launch a second one that fits your brand.
Example: If you sell a yoga mat, add yoga blocks or straps.
These “complementary products” let you cross-promote and increase your average order value.
Over time, you’ll go from one listing to a full brand that customers recognize and trust.
Once you’ve mastered marketing and started scaling, you’ve basically built a real business — not just a side hustle. 🎉
Now, let’s wrap up your guide with a simple FAQ section that answers the most common beginner questions about selling on Amazon FBA.
Source Products to Sell & Find Suppliers
Choosing the right product is crucial to your Amazon FBA business. If you want to sell on Amazon, it’s important to be able to source products fairly easily. This is where you will find products to private label. Private labeling means finding an existing product where you are allowed to put your own brand (label) on it. These are available from a plethora of third-party sellers.
Besides private labeling, you can also sell branded items from exclusive manufacturers. This involves dealing directly with the manufacturer bypassing the middleman. This also means you don’t have to private label anything. The advantage here is that people will recognize the brand you are selling. One course that teaches this well is The Wholesale Formula.
You should focus on these criteria when choosing a product:
1. Demand: Is this product in demand and can you find a supplier that is ready to produce it?
2. Availability: Does the product meet Amazon’s requirements (size, weight, dimensions)? Not all products will be accepted in Amazon FBA.
3. Profit margin: Look at the profit margin in relation to the price of the product. You might want to sacrifice margins in order to make more sales especially if the market is competitive
4. Price elasticity: Does this product have an elastic demand?
5. Competitive landscape: Who are your competitors for this product? Do they offer better prices than you do?
6. Supplier rate & quality: How much does it cost when you order from the supplier? Can you order in bulk to save on shipping costs? Is your supplier reliable?
7. Seasonal nature of the product: This is especially important for the clothing category. You need to ensure that there are no slow seasons for this product if it’s a seasonal item.
8. Import barriers/regulation: Can you import this product freely into Amazon FBA to be sold on their platform?
9. Weight & volume restrictions: Ensure that your product meets Amazon weight & dimensions requirements so that shipping fees will not eat up all your profits.
10. Shipping time & cost: How long does it take for your supplier to ship the item once you place your order? The shorter, the better!
What to Look for in Suppliers
There are a few things that you should be looking for when sourcing suppliers. When you’re dealing with a supplier, it’s important to note their location and whether they can ship to your destination country.
It’s also crucial to take a close look at the types of products they offer and how quickly their manufacturing process is. You should also make sure that they have a solid payment method in place, as well as reasonable prices for shipping the items from their country to yours.
Other things you should ask about include whether or not they have all of the certifications required by Amazon as well as any other company that may sell your product.
When Creating Your Brand Name
Once you can source your products, you need to create a brand revolving around your products and business goals. Choose a name that is easy to remember, isn’t very long and most important – is different from everyone else. It doesn’t necessarily have to match the products you are listing, but it should represent your business.
For example, if your focus is on beauty products, you want a name that reflects beauty. You can use a business name generator to help with that. Lastly, make sure you have the .com version of your brand name so that you can register it.
Here are other tips to consider when creating your brand:
Create Your Brand Logo
You will need an original branding logo for your new company or product line. You can hire a graphic artist, do it yourself or find one for cheap on places like Fiverr.
Branding Video
A branding video is a great way to show people who your business is and what you sell. This branding video will also play on Amazon for the customer when they scroll through their product listings. A branding video can be a huge advantage to your product and help you separate yourself from the competition. This branding video should have a professional feel, but not be too flashy.
Step 4: Create Your Amazon Seller Account
Here’s how to create your seller account:
Choose an account type
To open a seller account, you have to choose between an individual or a professional seller. An individual seller is free but charges $0.99 for each item sold so it’s only ideal if you plan on selling less than 40 items per month. A professional seller costs $39.99 per month but has no commission fees so it’s only worth the money if you plan on selling more than 40 items per month. Click either “Individual” or “Professional” depending on which account type you want to have*.
*Note: If your seller account becomes inactive, Amazon will charge a fee of $1 per month to keep your seller account active. If your seller account becomes inactive for 9 months then Amazon will delete your account, seller fees included.
Add FBA to your account
Keep in mind that you can’t create an FBA account until you set up your Seller account. The seller account is the base of your entire Amazon seller business so you have to make sure everything else is in place.
To add FBA, head over to the seller central dashboard and select “Inventory” from the menu on the left side. From there, click “Manage FBA Inventory” and then “Create a shipment.” You will need to input all of the necessary information about your product’s dimensions and weight for Amazon to ship them correctly.
When creating your product listing and Optimizing it
Now that you have got your branding down, have your products, and are in the process of shipping them to Amazon, you will need to create your product listing. Your product listings should include optimized titles, descriptions, keywords, and images.
Before you create your product listing on Amazon it’s important to understand the Amazon search engine. Search engines are designed to mimic real-life searches people make in their day-to-day lives. For example, when people want to buy a new smartphone they might use Google or Bing to find what they are looking for. The same principle applies when people are shopping on Amazon only that the search volume is much higher than Google or Bing because Amazon is used worldwide by both consumers and businesses alike.
Product Titles
To create a well-optimized product listing, product titles should have a professional feel but not be too flashy. Product titles should draw the attention of a customer from their Amazon search to your product. You can do so by placing some clear, unique, and identifying information to draw potential customers to your product.
A trick you can apply is searching for similar products sold on Amazon and seeing how they list their product titles. Also, don’t forget to put one keyword in your product title.
Here’s an example: VISION ZS6 1080P Full HD Sports Action Camera. I’ve included our main keywords “Vision” and “ZS6”.
Product Description
Your product description should include everything that the customer would normally look for. This would include sizes, colors, weight, dimensions, features, installation guides or anything else that would be applicable.
Images
The first thing your customer sees is the photo of your product. You don’t want to have blurred or poorly taken photos. If you have to hire a professional to do this, it would be worth the money. However, you can always just use your smartphone to take great pics as long as you’ve got the right angle, lighting, and background. Most people won’t need a professional photographer.
Inventory Management
To manage your inventory properly, it’s important to know your inventory turnover rate and how much inventory is needed to maintain that.
Your Inventory Turnover Rate (ITR) is calculated by dividing the number of units sold into the total number of units available for sale. For example, if you sell out 10 units then your ITR is 100%.
There are inventory management tools that can help you track everything rather than doing it on your own. Tools like SoStocked can help you with forecasting, over & under-ordering, tracking orders, managing bundles, and more.
Conclusion
If you really want to be an Amazon FBA seller, it’s important to understand the ins and outs of this process. There’s a lot to learn from sourcing the right product and supplier, learning all the intricacies of Amazon FBA, setting up your listing, and getting your items shipped to the fulfillment center.
How much money you make depends on a variety of factors. This includes the demand of a product, if your brand is trustworthy, reviews, competition, and so on. Some Amazon sellers make 6 figures a month in sales while others just make a few thousand. Learning to do it right is what will enable you to see success much faster.
If all this seems daunting and you need some serious hand-holding and more help, then I suggest checking out my best Amazon FBA courses post. A good course will point you in the right direction. It can help you scale your business, make fewer mistakes and save money in the process by knowing what a bad deal is. Get knowledge!
Frequently Asked Questions About Amazon FBA
💵 1. How much money do I need to start Amazon FBA?
You can technically start with as little as $500–$1,000, but having around $2,000–$3,000 gives you more flexibility for product samples, inventory, shipping, and marketing.
Your biggest expenses will be your first product order and Amazon’s FBA fees.
If you’re on a tighter budget, start small with a light, simple product — something under 1 lb that sells for around $20–$30.
🕒 2. How long does it take to start making sales?
Once your product is live and you’re running ads, most sellers start seeing sales within a few weeks.
But real, steady profit usually comes after a couple of months — once reviews build up and your ranking improves.
Remember: FBA is a business, not a get-rich-quick scheme. Patience and consistency win.
🏷️ 3. Do I need a business license to sell on Amazon?
Not necessarily. You can start as an individual seller without a business license.
However, once you start earning steady income, it’s smart to register an LLC or small business for tax and legal protection.
Always check your local laws — requirements vary depending on where you live.
📦 4. What are the best products to sell on Amazon FBA?
The best beginner products are:
- Small and lightweight (to keep fees low)
- Not fragile or easily breakable
- Priced between $20–$50
- Solves a simple problem or fulfills a common need
- Has steady demand but not crazy competition
Avoid electronics, food, or trademarked brands until you gain experience — they can lead to extra headaches.
💬 5. Is Amazon FBA still profitable in 2025?
Absolutely — Amazon FBA continues to grow every year.
But it’s more competitive now, which means quality products and branding matter more than ever.
The sellers who win today focus on creating real brands, providing value, and optimizing their listings — not chasing quick trends.
⚙️ 6. What’s the biggest mistake new sellers make?
The most common mistake? Jumping in too fast without proper research.
They pick random products, ignore fees, or over-order inventory — then get stuck with stock they can’t sell.
Follow the steps in this guide carefully, and you’ll already be ahead of 90% of beginners.
- What Every Company Should Consider When Choosing Business Software - November 15, 2025
- Top Affiliate Marketing Trends to Watch in 2026 - November 12, 2025
- Smart Way Businesses Improve Customer Care with Live Answering - November 12, 2025